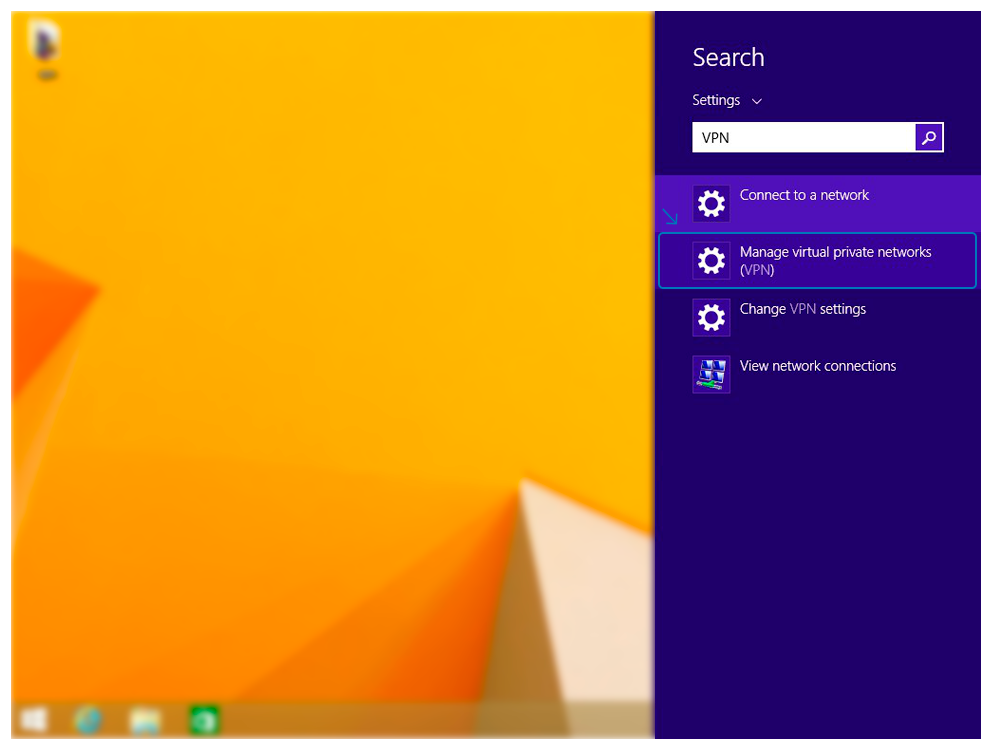
1. Open up the Search window by pressing the (Win+W) keys, and then you can click VPN. Next, you need to select Manage virtual private networks (VPN).
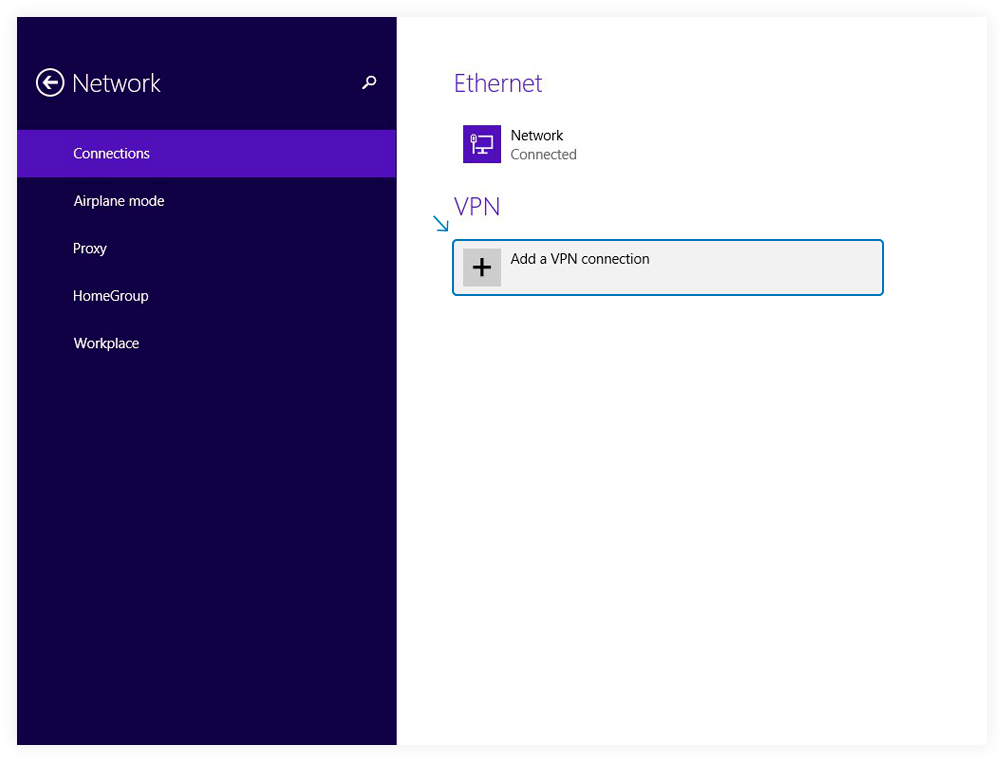
2. Click on the (+) icon to Add a VPN connection.
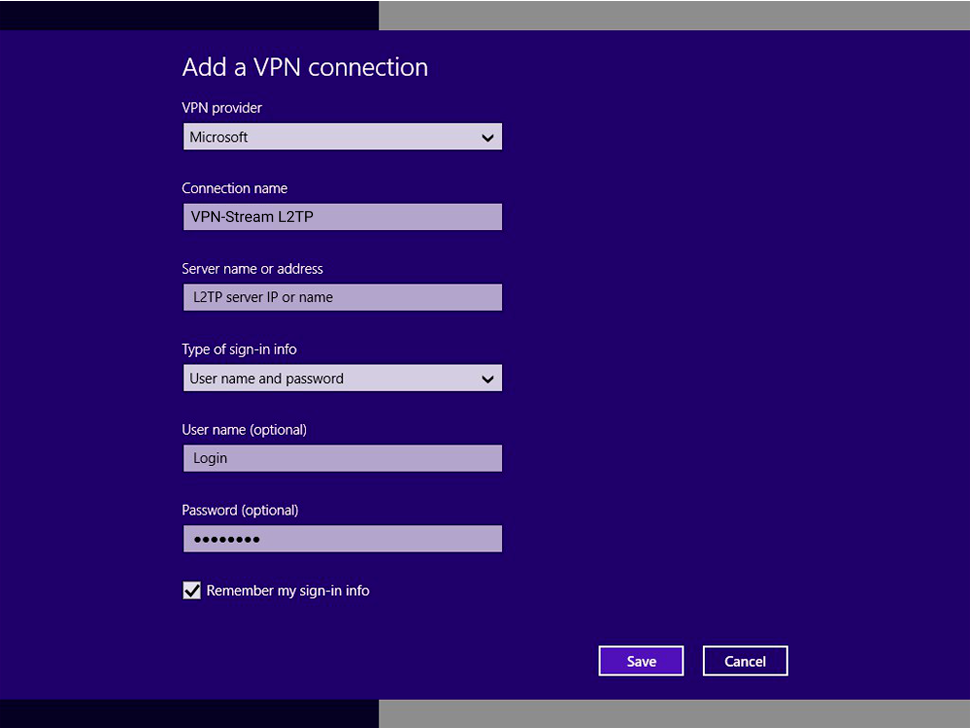
3. Now enter the VPN details as listed below:
VPN Provider: Choose Microsoft from the drop down menu.
Connection name: VPN-Stream.com L2TP
Server name or address: one of the
server domains from our
server list
Type of sign-in info: User name and password
Username: Login
Password: Password
Check the remember my sign-in info option, and then select Save to save your VPN settings.
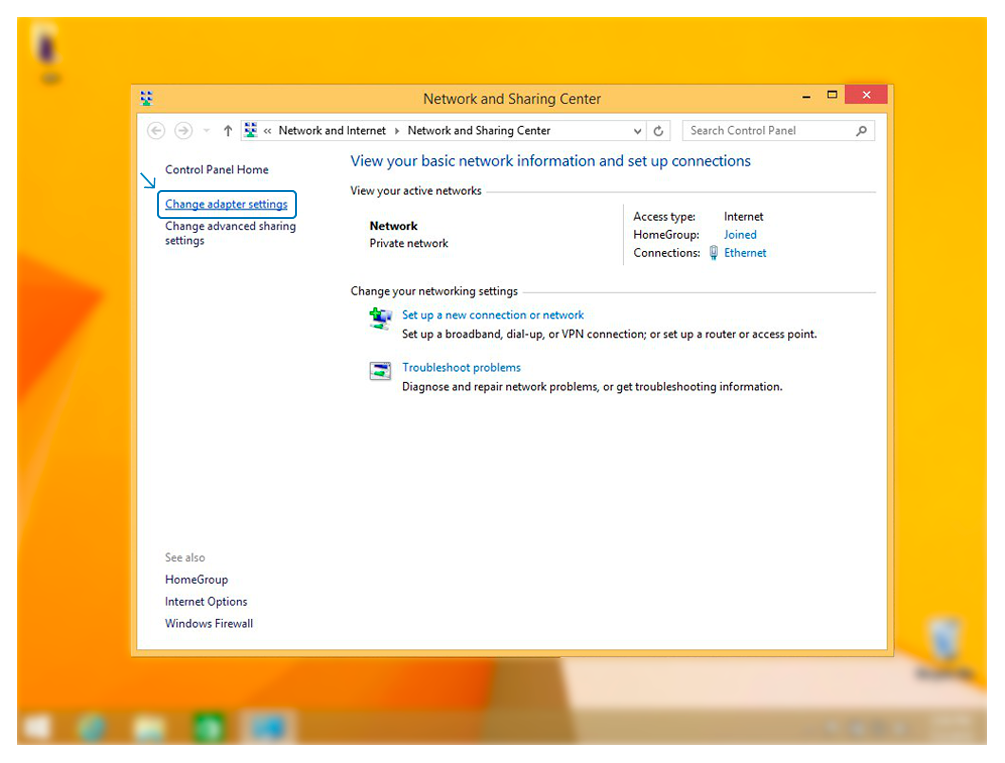
4. Go to your Desktop, and then right-click your network icon at the bottom right corner. Here you will have to choose Open Network and Sharing Center.
5. At the top left side, select Change adapter settings.
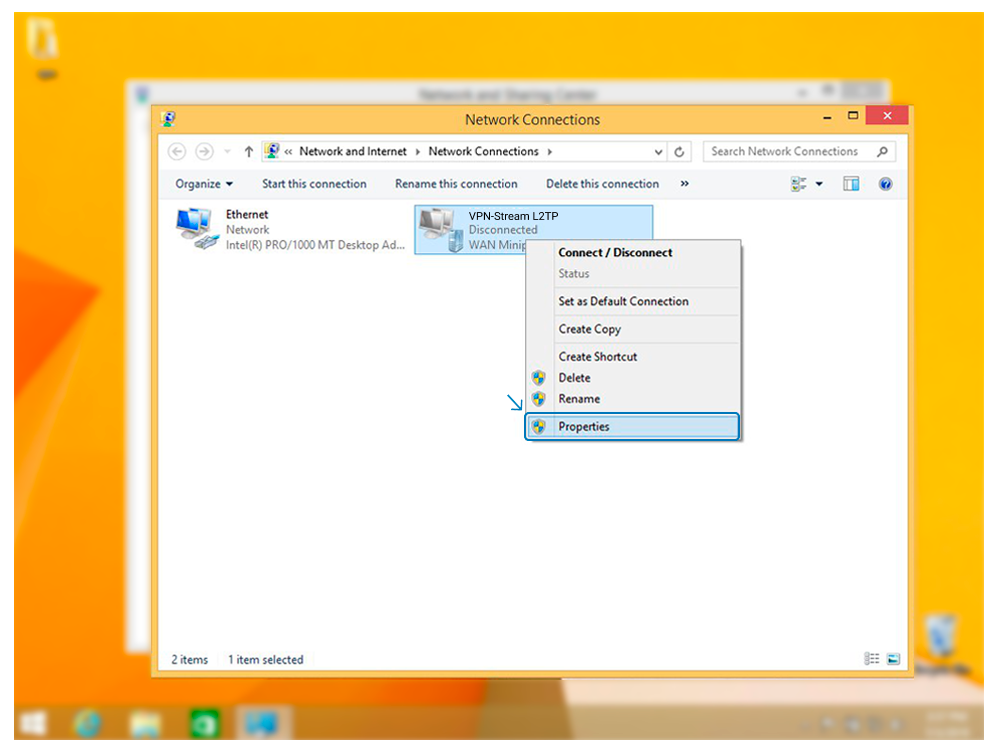
6. You should now be able to see the VPN connection that you’ve set up. Right click on the VPN-Stream.com L2TP icon and then select Properties.
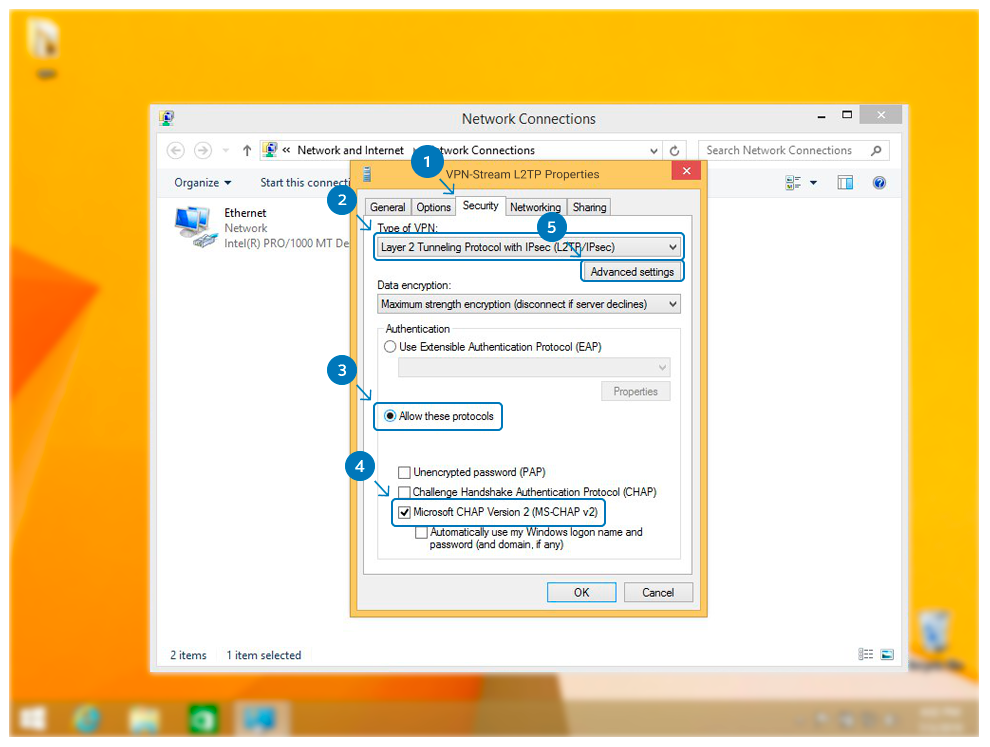
7. Click on the Security tab, here you will have to change the following settings:
Type of VPN: Layer 2 Tunneling Protocol with IPsec (L2TP/IPSec)
Allow these Protocols: Radio button selected
Microsoft CHAP Version 2 (MS-CHAP v2): Checked
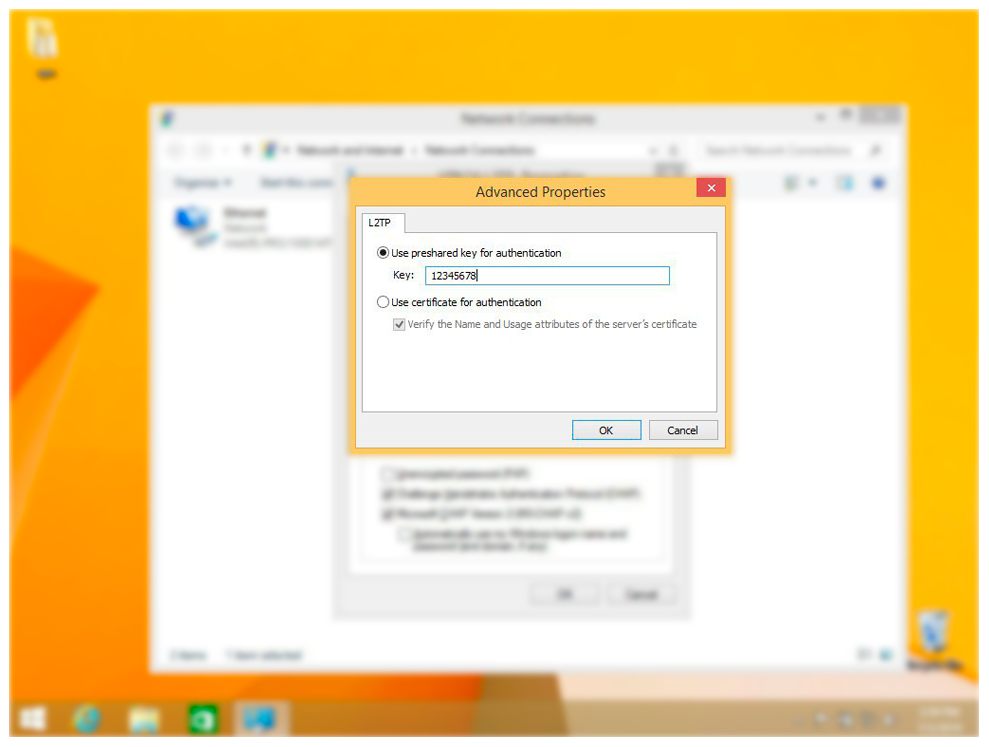
8. Click on the Advanced Settings Specify the PSK (Pre-shared key) and then click Ok
9. Click OK again to save your settings
Now you need to change your DNS
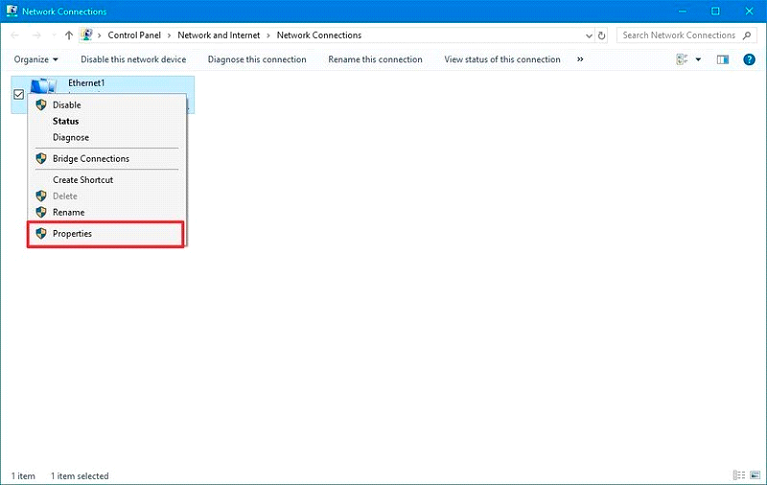
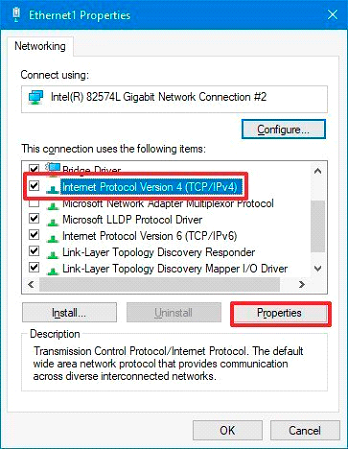
1. Right-click the network interface connected to the Internet, and then select the Properties option.
2. Select and check the Internet Protocol Version 4 (TCP/IPv4) option. 3. Click the Properties button.
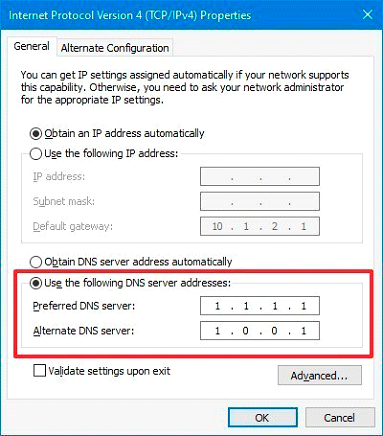
4. Click on the Use the following DNS server addresses option. 5. Insert your preferred and alternate DNS addresses.
For those using Google Public DNS, OpenDNS, or CloudFlare, you can access any of these settings:
-Google Public DNS: 8.8.8.8 and 8.8.4.4
-OpenDNS: 208.67.222.222 and 208.67.220.220
-Cloudflare: 1.1.1.1 and 1.0.0.1
6. Click the OK button.
7. Click the Close button.
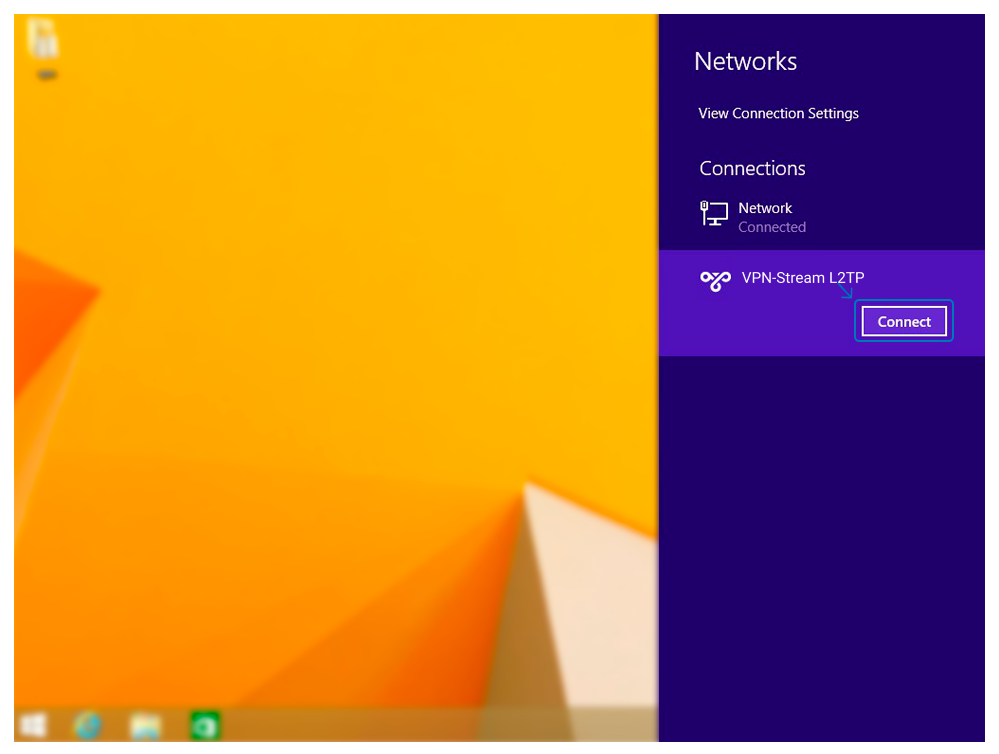
Click Connect on VPN-Stream.com L2TP
